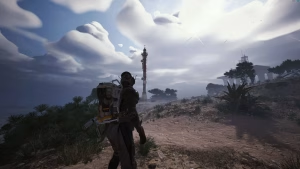
The Zone doesn’t give you directions — but we do. “To Origins of Freedom” is one of S.T.A.L.K.E.R. 2: Cost of Hope’s most important early-game missions, setting the tone for the player’s relationship with the Freedom faction and establishing critical story branches that affect the rest of the campaign. But like everything in the Zone, the path forward is deliberately unclear — and one wrong turn can cost you hours of backtracking or lock you out of valuable rewards.
S.T.A.L.K.E.R. 2: Cost of Hope launched as the highly anticipated DLC expansion for S.T.A.L.K.E.R. 2: Heart of Chornobyl, continuing the story deeper into the Exclusion Zone with new factions, artifacts, and dangers. The “To Origins of Freedom” mission is a pivotal quest that introduces players to the Freedom faction’s philosophy and asks them to make choices that ripple through the entire expansion.
This guide walks you through every objective, every optional route, and every choice consequence — so the Zone doesn’t swallow you whole.
Table of Contents
S.T.A.L.K.E.R. 2 Mission Overview at a Glance
| Detail | Info |
|---|---|
| Mission Name | To Origins of Freedom |
| Game | S.T.A.L.K.E.R. 2: Cost of Hope (DLC) |
| Base Game | S.T.A.L.K.E.R. 2: Heart of Chornobyl |
| Faction | Freedom |
| Mission Type | Main story quest |
| Location | Freedom territory — outskirts of the Zone |
| Prerequisites | Complete prior main quest + reach Freedom’s territory |
| Difficulty | Medium — combat + exploration + dialogue choices |
| Estimated Time | 30–60 minutes |
| Key Reward | Freedom faction reputation + gear + story branch unlock |
| Branching Paths | ✅ Yes — multiple outcomes based on choices |
How to Start “To Origins of Freedom”
| Step | Action | Notes |
|---|---|---|
| 1 | Complete the preceding main quest | The mission unlocks automatically after the prior story mission |
| 2 | Travel to Freedom’s territory | Marked on your PDA — follow the waypoint |
| 3 | Speak with the Freedom contact at the entrance | They’ll brief you on the mission objectives |
| 4 | Accept the mission | “To Origins of Freedom” appears in your PDA quest log |
⚠️ Before starting: Stock up on ammunition, medical supplies, and anti-radiation meds. The mission involves both dialogue AND combat — and the Zone doesn’t pause while you’re talking politics.
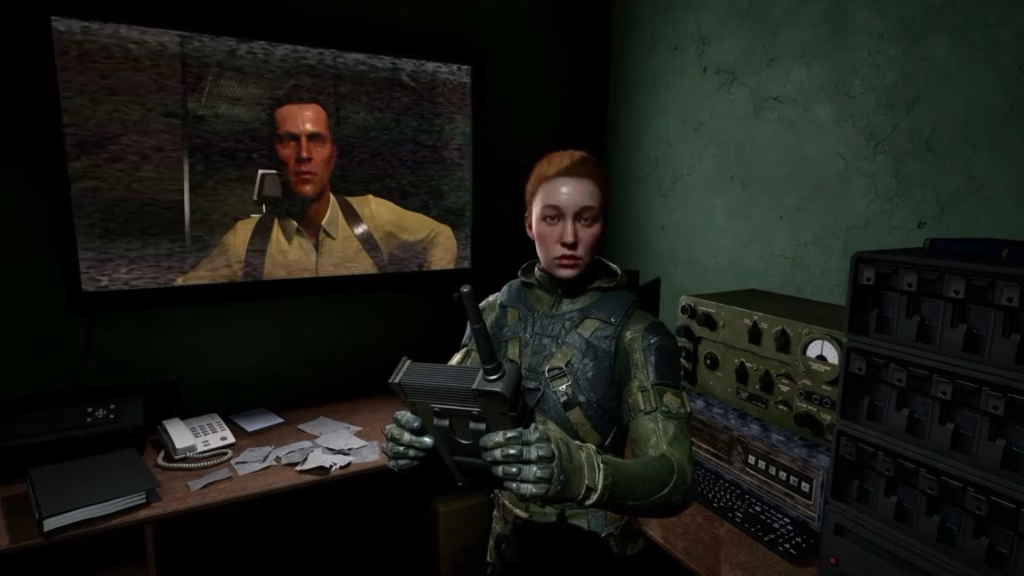
Recommended Loadout Before Starting
| Item | Quantity | Why |
|---|---|---|
| Primary weapon (assault rifle) | 1 + 200 rounds | Multiple combat encounters expected |
| Secondary weapon (shotgun/pistol) | 1 + 50 rounds | Close-quarters backup |
| Medkits | 5–8 | Health recovery between fights |
| Bandages | 10+ | Bleeding is frequent in the Zone |
| Anti-radiation meds | 3–5 | Radiation zones along the route |
| Grenades | 3–4 | Clearing entrenched enemy positions |
| Detector | 1 (any tier) | Optional artifact hunting along the way |
| Food/drink | 2–3 items | Stamina recovery for exploration |
| Repair kit | 1 | Weapon/armor condition maintenance |
Full Mission Walkthrough — Step by Step
Phase 1: Reaching the Freedom Outpost
After accepting the mission, you need to travel to a specific Freedom outpost deeper in their territory. The route passes through moderately dangerous terrain.
| Step | Action | Threats |
|---|---|---|
| 1 | Follow the PDA waypoint northwest from your current position | Mutant dogs patrol the open fields |
| 2 | Cross through the abandoned farmstead | Possible bandit ambush — check buildings |
| 3 | Navigate the irradiated creek bed | ⚠️ Radiation — use anti-rad meds |
| 4 | Reach the hill overlooking the Freedom outpost | Snork pack near the treeline — engage or avoid |
| 5 | Approach the outpost entrance | Freedom guards will recognize you — don’t shoot! |
Pro Tip: The abandoned farmstead in Step 2 contains a hidden stash under the floorboards of the main building. It’s not part of the mission, but the loot (usually ammo + a medkit) is worth the 30-second detour.
Phase 2: Meeting the Freedom Commander
Inside the outpost, you’ll meet the Freedom faction commander who explains the mission’s true objective. This is where the story deepens.
| Step | Action | Important |
|---|---|---|
| 1 | Enter the outpost’s main building | Guards will direct you inside |
| 2 | Speak with Commander Volkov | He explains Freedom’s current situation |
| 3 | Listen to the full briefing | ⚠️ Don’t skip dialogue — contains critical info for later choices |
| 4 | Ask all optional dialogue questions | Unlocks additional context + hidden objectives |
| 5 | Accept the objectives | Multiple sub-tasks are added to your PDA |
What Commander Volkov Tells You
| Information | Why It Matters |
|---|---|
| Freedom’s ideology — free access to the Zone for all | Establishes the faction’s moral framework |
| A rival faction is threatening Freedom’s outposts | Sets up the combat objective |
| A stolen artifact must be recovered | Sets up the exploration objective |
| A defector from Freedom has information | Sets up the dialogue/choice objective |
| The player’s choices will affect Freedom’s future | ⚠️ Choices have permanent consequences |
Phase 3: The Three Objectives
After the briefing, you have three sub-objectives that can be completed in any order. The order you choose affects difficulty and available resources:
Objective A: Clear the Enemy Outpost
| Step | Action | Difficulty |
|---|---|---|
| 1 | Travel to the marked enemy camp | 10-minute walk southeast |
| 2 | Scout the camp from elevated position | Use binoculars to count enemies |
| 3 | Choose your approach: stealth or assault | Both are viable |
| 4 | Eliminate all hostiles (6–8 enemies) | Mix of riflemen + one heavy gunner |
| 5 | Loot the camp for intelligence documents | Found on the commander’s body |
| 6 | Report success via PDA | Optional — can wait until all objectives complete |
Stealth Approach:
- Approach from the north — tall grass provides concealment
- Use suppressed weapons to pick off isolated guards
- Take out the heavy gunner first — he alerts others on contact
- 3–4 stealth kills can thin the camp before full engagement
Assault Approach:
- Approach from the south ridge — elevation advantage
- Open with grenades into the main cluster
- Rush during the confusion — clear building-by-building
- Faster but uses more resources
Objective B: Recover the Stolen Artifact
| Step | Action | Threats |
|---|---|---|
| 1 | Travel to the anomaly field north of the outpost | Gravitational anomalies — stay on the path! |
| 2 | Use your detector to locate the artifact’s signature | Follow the detector’s increasing signal |
| 3 | Navigate through the anomaly field | ⚠️ Springboard + Vortex anomalies — throw bolts to reveal safe paths |
| 4 | Reach the stash location — an abandoned vehicle | Container inside the vehicle |
| 5 | Retrieve the artifact | ⚠️ Radiation exposure — equip anti-rad gear |
| 6 | Return to the outpost with the artifact | Mutant encounters possible on return |
Anomaly Field Tips:
- Always throw bolts/objects before walking forward — anomalies are invisible until triggered
- The detector will pulse faster as you approach the artifact
- Gravitational anomalies pull you in — if you hear the telltale whooshing sound, STOP and backtrack
- The artifact itself emits radiation — carry it in your artifact container to minimize exposure
Objective C: Deal With the Defector
This is the most narratively complex objective — and where your choices matter most.
| Step | Action | Choice Point |
|---|---|---|
| 1 | Travel to the defector’s hiding location (marked on PDA) | Small cabin west of the anomaly field |
| 2 | Find the defector — Yuri | He’s hiding inside, armed but not immediately hostile |
| 3 | Engage in dialogue | Multiple conversation paths available |
| 4 | CHOICE POINT — see below | Your decision permanently affects the story |
The Critical Choice — What to Do With the Defector
This is the mission’s defining moment. Three options are available:
| Choice | What Happens | Immediate Result | Long-Term Consequence |
|---|---|---|---|
| 🟢 Convince Yuri to return to Freedom | Persuade him through dialogue — requires passing a speech check | Yuri returns peacefully | ✅ Best Freedom reputation gain + Yuri becomes an ally in later missions |
| 🟡 Let Yuri go free | Allow him to leave the Zone on his own | Yuri disappears — no further contact | 🟡 Neutral — no reputation loss, but Yuri’s information is lost |
| 🔴 Turn Yuri over to Freedom by force | Physically bring him back / Threaten him | Yuri is imprisoned by Freedom | ❌ Freedom respect gained but Yuri’s information is compromised — negative story consequences later |
How to Pass the Speech Check (Option 1)
The “convince” option requires having gathered enough information earlier in the mission. Here’s what enables the speech check:
| Requirement | How to Fulfill |
|---|---|
| Asked all optional questions to Commander Volkov | During Phase 2 briefing |
| Found the intelligence documents in the enemy camp | Objective A completion |
| Read the documents in your PDA inventory | Must actually open and read them |
| Approached Yuri without weapons drawn | Holster weapons before entering the cabin |
If you skipped the optional dialogue with Volkov or didn’t read the intelligence documents, the speech check option may not appear — defaulting you to only the “let go” or “force” options.
Phase 4: Returning to the Freedom Outpost
After completing all three objectives, return to Commander Volkov to report your results.
| Step | Action | Notes |
|---|---|---|
| 1 | Travel back to the Freedom outpost | Watch for new mutant spawns — the Zone shifts |
| 2 | Speak with Commander Volkov | He reacts based on your choices |
| 3 | Present the recovered artifact | Reputation reward + potential gear |
| 4 | Present the intelligence documents | Additional reputation + dialogue |
| 5 | Discuss Yuri’s fate | Volkov’s reaction depends on your choice |
| 6 | Receive mission completion rewards | Gear + faction standing + story progression |
All Mission Rewards — By Choice Path
| Outcome | Faction Rep | Gear Reward | Story Impact |
|---|---|---|---|
| 🟢 Yuri convinced + All objectives | Maximum Freedom reputation | Best weapon/armor reward | Yuri becomes recurring ally |
| 🟡 Yuri released + All objectives | Moderate Freedom reputation | Standard weapon/armor reward | Neutral — no future Yuri involvement |
| 🔴 Yuri forced + All objectives | Freedom reputation gained but trust damaged | Standard reward — possible locked dialogue later | Yuri imprisoned — negative consequences in Act 3 |
| ⚠️ Incomplete objectives | Reduced reputation | Reduced rewards | Missing intel affects future missions |
The Best Possible Outcome
For the optimal result:
- ✅ Ask ALL optional questions to Commander Volkov
- ✅ Clear the enemy outpost (Objective A) — read the intelligence documents
- ✅ Recover the artifact (Objective B) — deliver it intact
- ✅ Convince Yuri to return peacefully (Objective C — speech check)
- ✅ Return to Volkov with everything
This gives maximum Freedom reputation, the best gear reward, and sets up Yuri as an ally for future missions — the definitive “golden path” through the mission.
Hidden Secrets & Optional Content Along the Route
The Zone rewards exploration — and “To Origins of Freedom” has several hidden elements most players miss:
| Hidden Content | Location | Reward |
|---|---|---|
| 🗺️ Farmstead stash | Under floorboards in the abandoned farmstead (Phase 1) | Ammo + Medkit |
| 📻 Radio signal | Tune PDA radio near the irradiated creek | Coordinates to a hidden artifact cache |
| 📝 Yuri’s journal | Inside the cabin where Yuri hides — on the desk | Background lore + speech check bonus |
| 🎒 Dead stalker backpack | Near the anomaly field entrance (large rock) | High-tier weapon attachment |
| 🦎 Rare mutant spawn | Southeast of the enemy camp — in the marsh | Rare mutant parts for crafting |
| 🗝️ Locked chest | Inside the enemy camp’s fortified building | Requires looting the key from the camp commander |
The Locked Chest — Easy to Miss
The enemy camp commander (Objective A) carries a key on his body. Most players loot his weapon and ammo but miss the key in his inventory. This key opens a locked chest in the fortified building of the same camp — containing a rare weapon upgrade or attachment.
| Step | Action |
|---|---|
| 1 | Loot the enemy camp commander’s body thoroughly |
| 2 | Find the key in his inventory (easy to overlook) |
| 3 | Enter the fortified building in the camp (locked door or chest) |
| 4 | Use the key to open the chest |
| 5 | Collect the rare weapon attachment |
Combat Tips for This Mission
| Tip | Why |
|---|---|
| Save before every major encounter | S.T.A.L.K.E.R. 2 is brutally punishing — saves are your lifeline |
| Use cover religiously | Standing in the open = instant death from multiple angles |
| Headshots are everything | Body shots waste ammo; headshots are efficient kills |
| Throw bolts before walking | Anomaly fields are death traps without bolt-throwing |
| Listen for audio cues | Mutants growl, anomalies hum, enemies talk — audio saves lives |
| Repair weapons between fights | Degraded weapons jam at the worst possible moment |
| Don’t hoard healing items | Use medkits when below 50% health — dying with a full inventory is embarrassing |
| Approach Yuri’s cabin holstered | Drawing weapons may lock you out of the speech check option |
Faction Reputation System — How Freedom Standing Works
“To Origins of Freedom” is one of the first major opportunities to build Freedom faction reputation. Understanding how the system works helps you make informed choices:
| Reputation Level | Benefits | How to Reach |
|---|---|---|
| Neutral | Basic access to Freedom territory | Starting default |
| Friendly | Access to Freedom merchants + gear | Complete “To Origins of Freedom” favorably |
| Trusted | Discounted prices + unique quests | Multiple Freedom missions completed well |
| Allied | Best gear + secret missions + safe passage | Full Freedom questline completion |
| Hostile | ❌ Freedom attacks on sight | Betray Freedom or ally with their enemies |
Your choice regarding Yuri is the single biggest reputation swing in this mission:
- Convince (speech check): +Large reputation
- Release: +Small reputation
- Force: +Moderate reputation BUT -Trust modifier (affects future dialogue options)
How This Mission Connects to the Larger Story
“To Origins of Freedom” isn’t just a standalone quest — it’s a critical junction in the Cost of Hope DLC’s narrative:
| Story Connection | How This Mission Affects It |
|---|---|
| Freedom’s survival | Your performance determines Freedom’s strength in Act 2 |
| Yuri’s fate | If convinced to return, Yuri provides critical intel in Act 3 |
| Rival faction strength | Clearing the enemy camp weakens their presence in later zones |
| Artifact significance | The recovered artifact becomes plot-relevant in the main story |
| Player’s Zone reputation | Other factions learn of your actions — affects their treatment of you |
The mission’s branching consequences demonstrate S.T.A.L.K.E.R. 2’s commitment to meaningful player choice — a hallmark of the franchise since the original 2007 game.
What Is S.T.A.L.K.E.R. 2: Cost of Hope?
Cost of Hope is the first major DLC expansion for S.T.A.L.K.E.R. 2: Heart of Chornobyl — GSC Game World’s long-awaited sequel to the legendary 2007 survival FPS. The expansion continues the story deeper into the Exclusion Zone, introducing new factions, artifacts, anomalies, and dangers.
| Detail | Info |
|---|---|
| Game | S.T.A.L.K.E.R. 2: Heart of Chornobyl — Cost of Hope DLC |
| Developer | GSC Game World |
| Platform | PC, Xbox Series X|S |
| Game Pass | ✅ Base game available (DLC status TBA) |
| Genre | Survival FPS / Open-world / Horror |
| Setting | Chornobyl Exclusion Zone, Ukraine |
| Core Gameplay | Exploration, combat, artifact hunting, faction politics, survival |
S.T.A.L.K.E.R. 2 combines intense FPS combat with survival mechanics (hunger, radiation, equipment degradation), an open-world Zone filled with deadly anomalies and mutants, and a branching narrative driven by player choices — making it one of the most immersive and unforgiving games in modern gaming.
For a comprehensive overview of the S.T.A.L.K.E.R. franchise and its legacy, visit the official S.T.A.L.K.E.R. 2 Wikipedia page.
Pro Tips for “To Origins of Freedom”
| Tip | Why It Matters |
|---|---|
| Talk to everyone at the Freedom outpost | NPCs offer side information that enriches choices |
| Read ALL documents you find | Intelligence documents unlock the speech check for Yuri |
| Save before entering Yuri’s cabin | Your choice is permanent — save allows you to see all outcomes |
| Complete Objective A before Objective C | The intelligence documents from the camp unlock Yuri’s speech check |
| Don’t rush through anomaly fields | One wrong step = death. Throw bolts constantly. |
| Explore off the critical path | Hidden stashes, rare mutants, and lore are scattered throughout |
| Holster your weapon before talking to Yuri | Drawing a weapon may lock the “convince” option |
| Repair your gear after the enemy camp fight | Phase 3–4 has more combat — degraded weapons will jam |
| Carry the artifact in your artifact container | Holding it in regular inventory causes radiation damage |
| Check your PDA after every conversation | New map markers and notes appear frequently |
Optimal Mission Order — The Recommended Path
| Order | Objective | Why This Order |
|---|---|---|
| 🥇 1st | Objective A — Clear enemy camp | Gets intelligence documents needed for speech check |
| 🥈 2nd | Objective B — Recover artifact | Straightforward combat + exploration |
| 🥉 3rd | Objective C — Deal with Yuri | Save for last — requires documents from Objective A for best outcome |
| 4th | Return to Commander Volkov | Report all results for maximum reward |
This order ensures you have ALL prerequisites for the speech check when you reach Yuri — giving you access to the mission’s best possible outcome.
Common Mistakes That Ruin Your Run
| Mistake | Consequence | Fix |
|---|---|---|
| Skipping Commander Volkov’s optional dialogue | Missing context needed for speech check | Always exhaust all dialogue options |
| Doing Objective C before Objective A | Can’t pass speech check without intelligence docs | Complete Objective A first |
| Not reading intelligence documents | Documents must be read, not just collected | Open PDA → Documents → Read each one |
| Approaching Yuri with weapons drawn | May lock “convince” option — only “force” or “release” available | Holster weapons before entering the cabin |
| Walking through anomaly fields without bolts | Instant death from invisible anomalies | Always throw bolts/items to reveal safe paths |
| Ignoring the locked chest in the enemy camp | Missing rare weapon attachment | Loot the camp commander’s key → open the chest |
| Not saving before Yuri’s choice | Stuck with a suboptimal outcome | Save before entering the cabin |
| Hoarding medkits through combat | Dying with a full inventory of healing items | Use medkits at 50% health — don’t be greedy |
The Bottom Line
“To Origins of Freedom” is a masterfully designed mission that showcases everything S.T.A.L.K.E.R. 2: Cost of Hope does best — brutal combat, atmospheric exploration, and meaningful choices that actually matter. The three-objective structure gives players freedom to approach the mission in any order, while the Yuri choice creates a genuine moral dilemma with permanent story consequences.
For the best outcome: complete Objective A first (enemy camp + intelligence documents), then Objective B (artifact recovery), then approach Yuri with weapons holstered and all dialogue prerequisites met. Convince him to return, deliver everything to Commander Volkov, and you’ll walk away with maximum Freedom reputation, the best gear, and a powerful ally for future missions.
The Zone doesn’t care about your feelings. But with this guide, at least it won’t care about your confusion either. Good hunting, Stalker. ☢️🔫
👉 Also Read: Latest Gaming News & Guides on TechnoSports
👉 Also Read: Trending Tech & Gaming Stories This Week
FAQs
Q: How do I pass the speech check with Yuri in “To Origins of Freedom”?
To unlock the speech check option (best outcome), you must: ask all optional questions to Commander Volkov during the briefing, complete Objective A (clear the enemy camp) and loot the intelligence documents from the camp commander’s body, actually read the documents in your PDA inventory, and approach Yuri’s cabin with your weapons holstered. If any of these prerequisites are missing, the “convince” dialogue option may not appear.
Q: What is the best order to complete the objectives in “To Origins of Freedom”?
Complete Objective A (clear the enemy camp) first — this gives you the intelligence documents needed for Yuri’s speech check. Then complete Objective B (recover the artifact) for straightforward combat and exploration. Save Objective C (deal with Yuri) for last, as it requires the documents from Objective A for the best possible outcome. This order ensures you have all prerequisites for maximum rewards and the mission’s golden path.