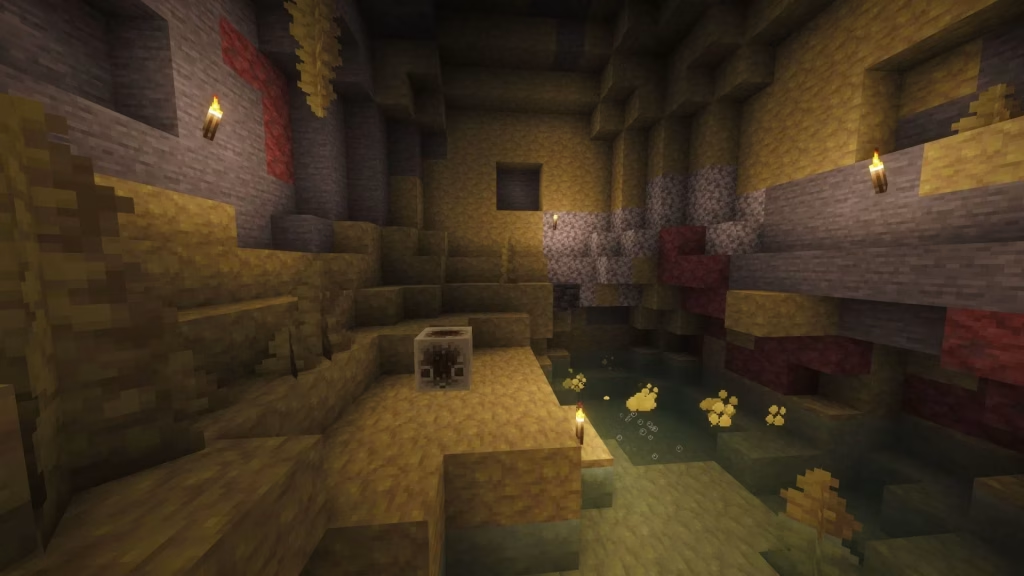
Minecraft shaders represent graphical enhancement modifications dramatically improving visual quality through advanced lighting, shadows, and environmental effects. Shader implementation transforms Minecraft’s aesthetic from blocky simplicity to photorealistic landscapes with dynamic lighting and atmospheric effects.
Shaders represent the most impactful visual modifications available, delivering professional-grade graphics enhancement rivaling AAA game productions.
Table of Contents
Minecraft Shader Fundamentals & Benefits
| Aspect | Details |
|---|---|
| Modification Type | Visual Enhancement |
| Primary Effect | Advanced Graphics Rendering |
| Key Features | Lighting, Shadows, Reflections |
| Performance Impact | Significant GPU Demand |
| Compatibility | Java Edition (Primary) |
| Installation Method | Mod Loader Required |
| Version Support | Version 2.6 Compatibility |
What Shaders Accomplish
Visual Enhancements:
Shaders dramatically improve Minecraft’s visual presentation through:
- Advanced dynamic lighting systems
- Realistic shadow rendering
- Water reflection effects
- Volumetric lighting (god rays)
- Ambient occlusion creating depth
- Enhanced color grading
- Atmospheric fog effects
Environmental Improvements:
- Realistic sky rendering
- Enhanced cloud effects
- Particle system improvements
- Better foliage rendering
- Advanced terrain shading
- Improved weather effects
- Customizable visual styles
Performance Considerations:
Shaders demand significant GPU resources, potentially reducing frame rates on lower-end systems. Optimization balances visual quality against performance.
Prerequisites for Shader Installation
System Requirements:
- Java Edition Minecraft (primary shader support)
- Dedicated graphics card (GPU)
- Minimum 4GB RAM (8GB+ recommended)
- Adequate storage space (shaders require 200MB-1GB)
- Updated graphics drivers
Software Requirements:
- Minecraft Java Edition launcher
- Fabric or Forge mod loader
- Appropriate shader mod (Iris, Optifine)
- Shader pack files
Technical Knowledge:
- Basic file management
- Understanding mod installation
- Willingness to troubleshoot compatibility issues
Master Minecraft modifications: Explore our comprehensive gaming guides and Minecraft tips for shader guides and optimization strategies!
Installation Process Step-by-Step
Step 1: Install Mod Loader (Fabric Recommended)
Download Fabric installer:
- Visit fabricmc.net
- Download installer for your Minecraft version
- Run installer selecting client installation
- Installer automatically configures Minecraft launcher
Step 2: Install Iris Mod (Shader Support)
Download Iris:
- Visit irisshaders.net
- Download latest version compatible with your Minecraft version
- Place .jar file in mods folder (Minecraft directory/mods)
- Iris automatically configures with Fabric
Step 3: Locate Shaders Folder
Create appropriate directory:
- Navigate to Minecraft installation directory
- Create folder: .minecraft/shaderpacks (if not existing)
- This folder stores shader pack files
Step 4: Download Shader Packs
Select and download shaders:
- Visit shader repositories (Curseforge, Shadersmods)
- Download desired shader packs (.zip files)
- Place shader files in shaderpacks folder
- Do NOT extract—keep as .zip files
Step 5: Launch Minecraft & Configure
Apply shaders:
- Launch Minecraft Java Edition
- Navigate to Options → Video Settings
- Select “Shader Packs” option
- Choose installed shader from list
- Apply settings
Popular Shader Packs for Version 2.6
Complementary Shaders:
Balanced shader pack offering quality visuals with reasonable performance impact. Excellent for most systems providing visual enhancement without extreme optimization demands.
BSL Shaders:
High-quality shader featuring advanced lighting and realistic water effects. Popular choice balancing visual quality with performance stability.
SEUS (Sonic Ether’s Unbelievable Shaders):
Premium shader pack delivering photorealistic results. Demands significant GPU resources but produces exceptional visual quality.
Sildurs Shaders:
Versatile shader offering multiple quality tiers enabling performance optimization based on system capabilities.
Tea Shader:
Lightweight shader option suitable for lower-end systems while delivering noticeable visual improvements.
Performance Optimization Strategies
Graphics Settings Adjustment:
Render Distance:
- Reduce from 16 to 8-12 chunks
- Decreases rendering load
- Maintains gameplay visibility
Shadow Distance:
- Lower shadow rendering distance
- Reduces GPU demand
- Maintains visual quality
Particle Effects:
- Reduce particle count
- Disable unnecessary effects
- Preserve performance
Video Settings Fine-Tuning:
- Disable advanced features (ray tracing if available)
- Reduce water/reflection quality
- Lower cloud rendering quality
- Disable volumetric lighting if necessary
Hardware Optimization:
- Close background applications
- Update GPU drivers
- Monitor temperature preventing throttling
- Allocate sufficient RAM to Minecraft
Shader Customization Options
In-Game Configuration:
Access shader settings:
- Press Shift+O while in-game
- Opens shader customization menu
- Adjust various parameters in real-time
Common Customizable Settings:
- Brightness and contrast levels
- Shadow intensity and softness
- Water transparency and reflectivity
- Cloud density and appearance
- Ambient light intensity
- Color grading and saturation
- Visual effect toggles
Experimentation Benefits:
Test different settings identifying optimal balance between visual quality and performance on your system.
Troubleshooting Common Issues
Shaders Not Appearing in Menu:
- Verify Iris installation
- Confirm shader files in correct folder (.zip format)
- Restart Minecraft launcher
- Check mod loader compatibility
Extreme Performance Drops:
- Switch to lighter shader pack
- Reduce render distance significantly
- Disable advanced shader features
- Check GPU driver updates
- Monitor system temperature
Visual Glitches or Artifacts:
- Update graphics drivers
- Switch alternative shader pack
- Reduce shader quality settings
- Verify mod compatibility
Mod Conflicts:
- Remove conflicting mods temporarily
- Test shader with minimal mods installed
- Verify all mods compatible with version 2.6
System Performance Monitoring
FPS Tracking:
- Monitor frame rates during gameplay
- Note performance across different settings
- Identify optimization opportunities
- Test configuration changes
Temperature Monitoring:
- Track GPU temperature during play
- Ensure cooling prevents throttling
- Prevent hardware damage through overheating
- Monitor sustained performance
Resource Utilization:
- Monitor GPU memory usage
- Track RAM allocation
- Identify resource bottlenecks
- Optimize allocation accordingly
Advanced Shader Concepts
Deferred Rendering:
Some shaders employ deferred rendering improving lighting calculation efficiency, enabling more light sources within performance budgets.
Ray Tracing Support:
Advanced shaders supporting ray tracing deliver photorealistic reflections and lighting—demands significantly more GPU resources.
PBR Materials (Physically-Based Rendering):
Advanced shaders using PBR principles create realistic material interactions with light, enhancing visual authenticity.
Shader vs. Texture Pack Distinction
Shaders Focus:
- Lighting systems
- Shadow rendering
- Visual effects
- Post-processing
- Environmental atmosphere
Texture Packs Focus:
- Block appearance
- Item textures
- Entity models
- UI elements
- Entity skins
Complementary Use:
Combine shaders with texture packs creating comprehensive visual enhancement exceeding either modification alone.
Multiplayer Compatibility
Server Considerations:
- Single-player only typically
- Some servers support shader usage
- Verify server permissions before installation
- No multiplayer modifications required for compatible servers
Vanilla Compatibility:
- Shaders don’t affect multiplayer gameplay
- Other players don’t require shaders
- Visual enhancements personal to your client
- No advantage/disadvantage in multiplayer
Resource Packs & Shader Interaction
Optimal Combination:
- Use quality resource packs with shaders
- Select packs specifically designed for shader compatibility
- Test combinations identifying optimal visual results
- Adjust settings achieving desired aesthetic
Community Recommendations:
- Research resource pack-shader compatibility
- Read community reviews identifying proven combinations
- Share personal setups helping other players
- Experiment discovering unique configurations
Recording With Shaders
Content Creation Considerations:
Performance Requirements:
- Recording significantly increases computational demand
- Reduce shader quality for stable recording
- Prioritize consistent frame rates over maximum settings
- Enable performance monitoring during recording
File Management:
- Shader-enhanced recordings require larger file sizes
- Ensure adequate storage space
- Consider compression settings reducing file sizes
- Backup recordings preventing data loss
FAQs
Q: What are the minimum system requirements for using shaders in Minecraft version 2.6, and which shader packs work best for lower-end systems?
A: Minimum requirements include dedicated graphics card, 4GB RAM, Java Edition, and mod loader (Fabric); lightweight shader packs like Sildurs (lite), Tea Shader, or Complementary offer visual improvements on lower-end systems while reducing performance impact compared to premium shaders like SEUS.
Q: How do you prevent significant FPS drops when using shaders, and what optimization strategies balance visual quality with performance?
A: Reduce render distance to 8-12 chunks, disable advanced shader features (ray tracing, volumetric lighting), lower shadow distance, close background applications, update GPU drivers, allocate adequate RAM, use lightweight shader packs, and continuously monitor performance through testing different configurations finding optimal balance.